The PowerBook G4 Story
Or:
Squeezing Every Last Drop of Life out of Abandoned Hardware
Platforms
28 April 2021 [Permanent link]
Last updated: 19 June 2024 (Added info about bootloaders,
GRUB woes and yaboot)
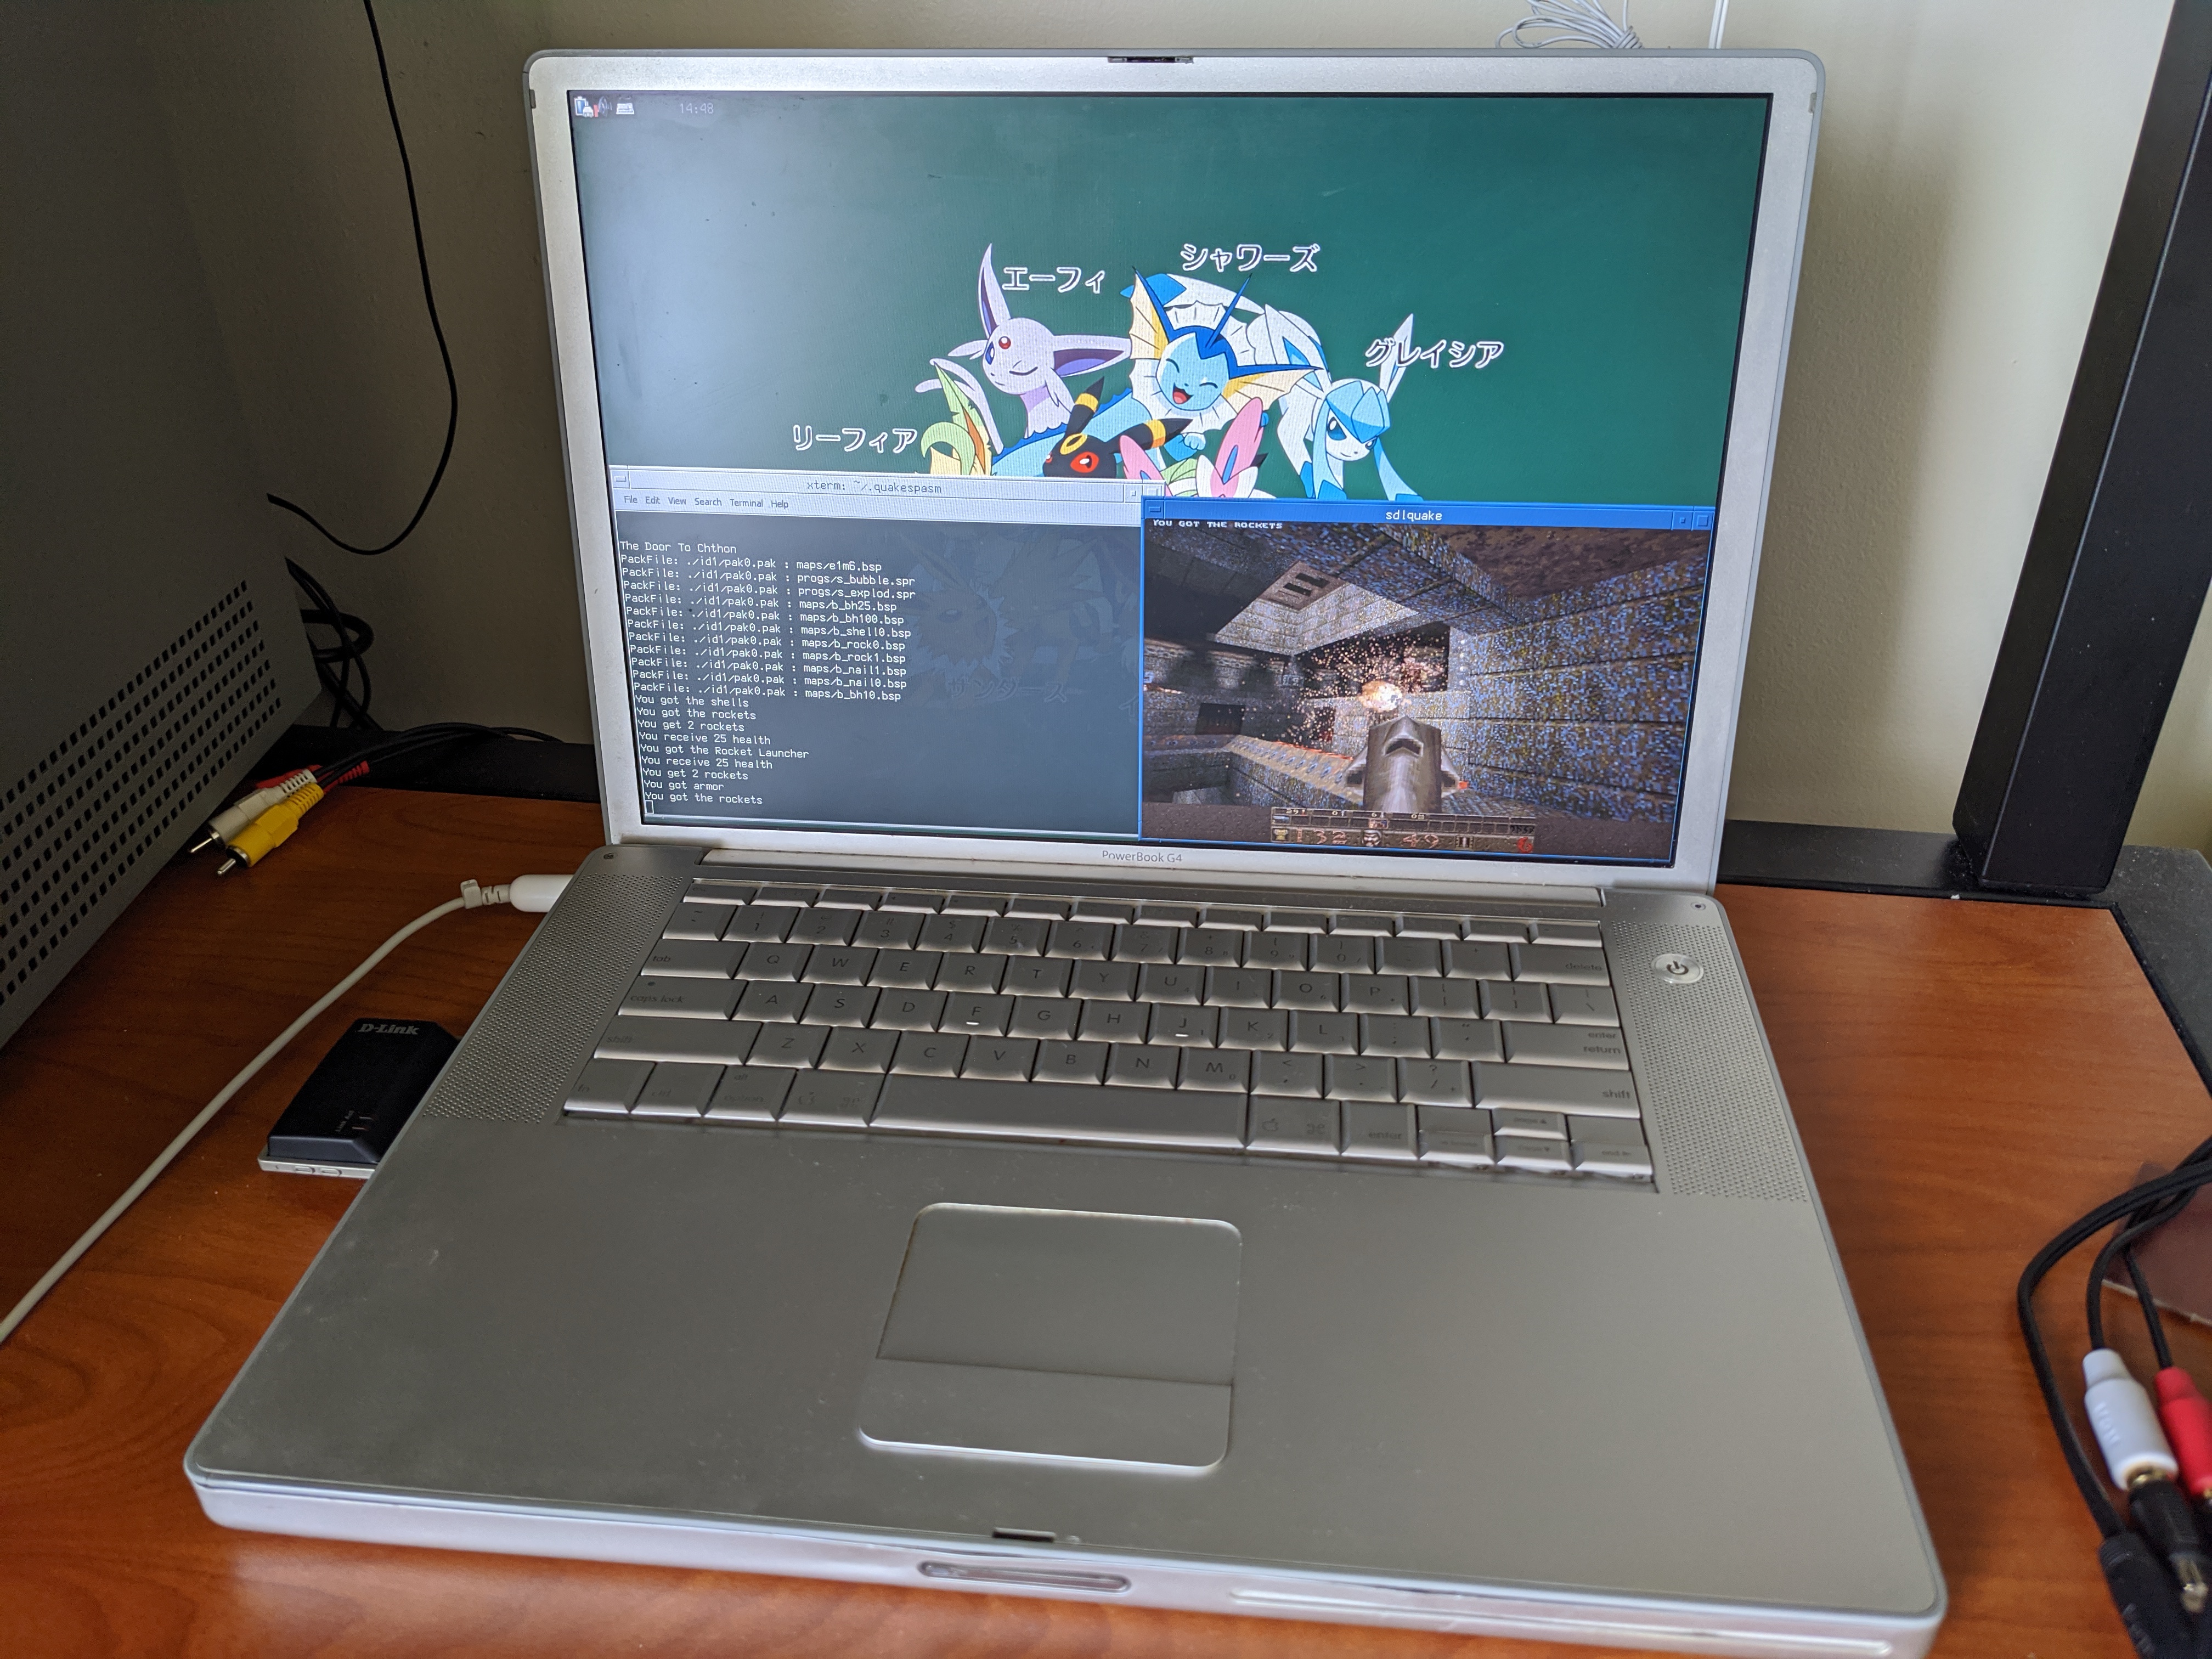
Spartan though this FVWM environment might seem, it is the same way I have had my newest desktop and laptops configured for several years.
A while ago now (November 2017, at latest), I got a 1.33GHz aluminum PowerBook G4 (model A1095) from a HAM radio convention. I pretty much instantly regretted my impulsive buy (since I saw something else that I also wanted and didn't have the cash on-hand anymore), but no refunds. So I brought it home.
The following is a partial story of my journey with this machine. I've since discovered what it can do, as well as its limitations, and I'm not quite so regretful of my purchase anymore. This laptop has yielded some great learning experiences for me with respect to hardware and software, and also made me more mindful of good software design principles.
Note also that much of the stuff I am writing about was done a year or more ago, and is therefore likely to have accidental omissions, and possibly actual inaccuracies as well. I just think it's been a kind of fun project to get this thing on its feet, and that maybe other people could benefit or possibly even be entertained by the story.
First Impressions/Hardware Summary:
First, I should acknowledge that even if their software is nice, I've never really "loved" Apple hardware the way I love my old Thinkpads or Nintendo consoles. That is mainly because I'm the kind of person who impulsively tears down every bit of kit I get within about a week of the acquisition. But Apple doesn't like people to do that. And to me, trying to scare away inquisitive people who want to know how things work is really a weird tactic for a company that supposedly needs engineers to survive. To me, a product that I'm supposed to treat as a black box is a product I don't really get to use to its fullest.
But yeah, There's a big reason I bought this powerbook. For fun! Isn't that best reason to do something? So, I was prepared for the challenges that tend to be incurred when dealing with Apple products. First, let's look at the hardware a bit.
I am still ambivalent about this 'book overall (having had to open it
up and at one point remove the entire motherboard from the chassis to
reach the power jack), but I am at the very least now convinced that
Apple in ~2004 was a very different company than it is today. There are
several things that exemplify this, but some of the most prevalent are:
- Standard computer I/O ports:
- 3x USB 2.0 ports
- 1x full-size gigabit ethernet port
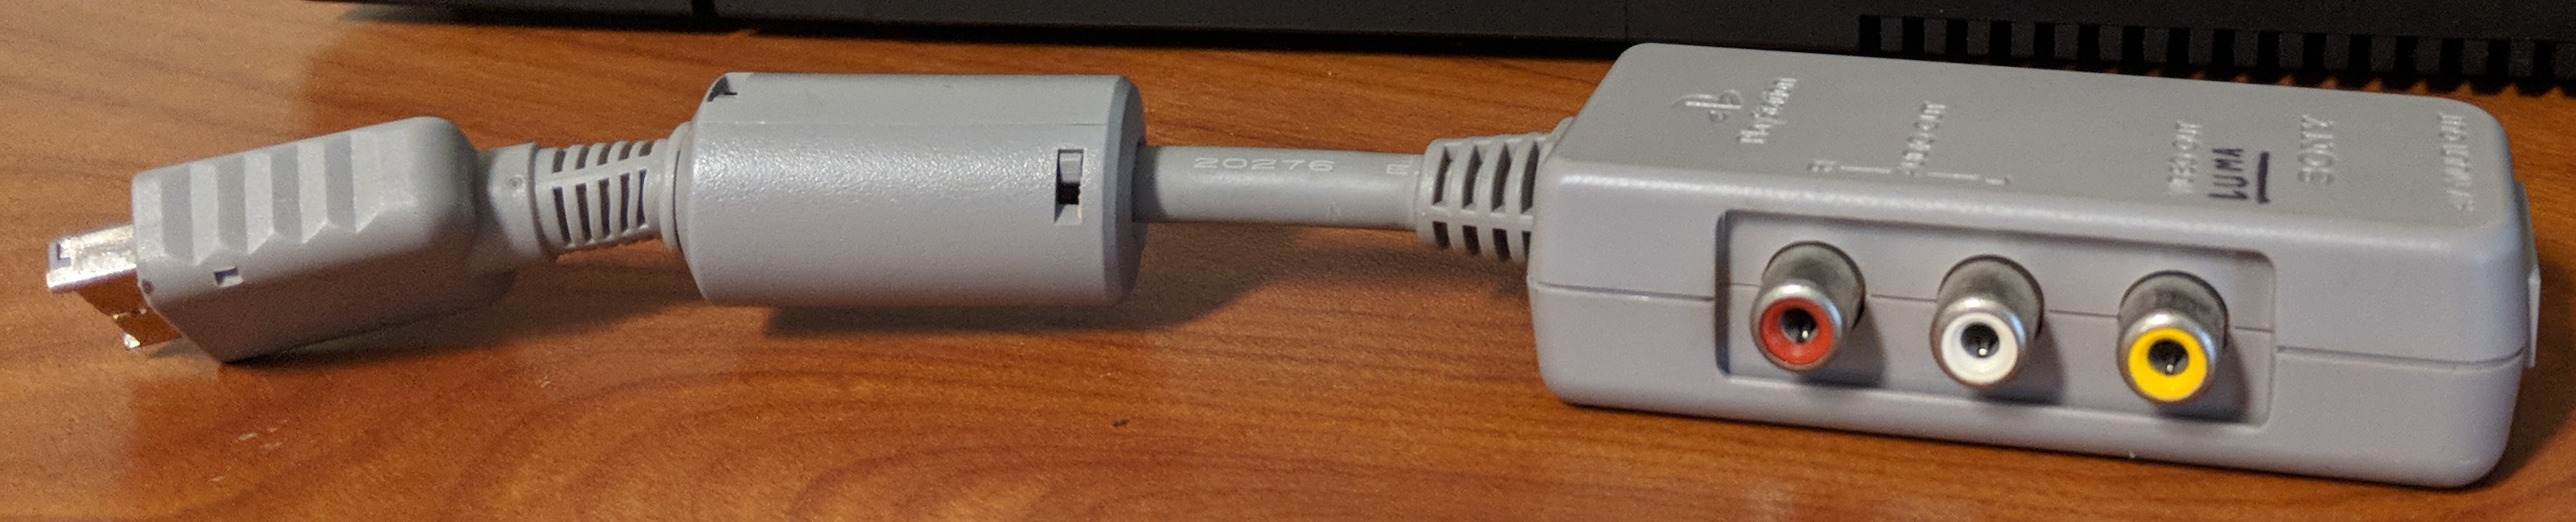
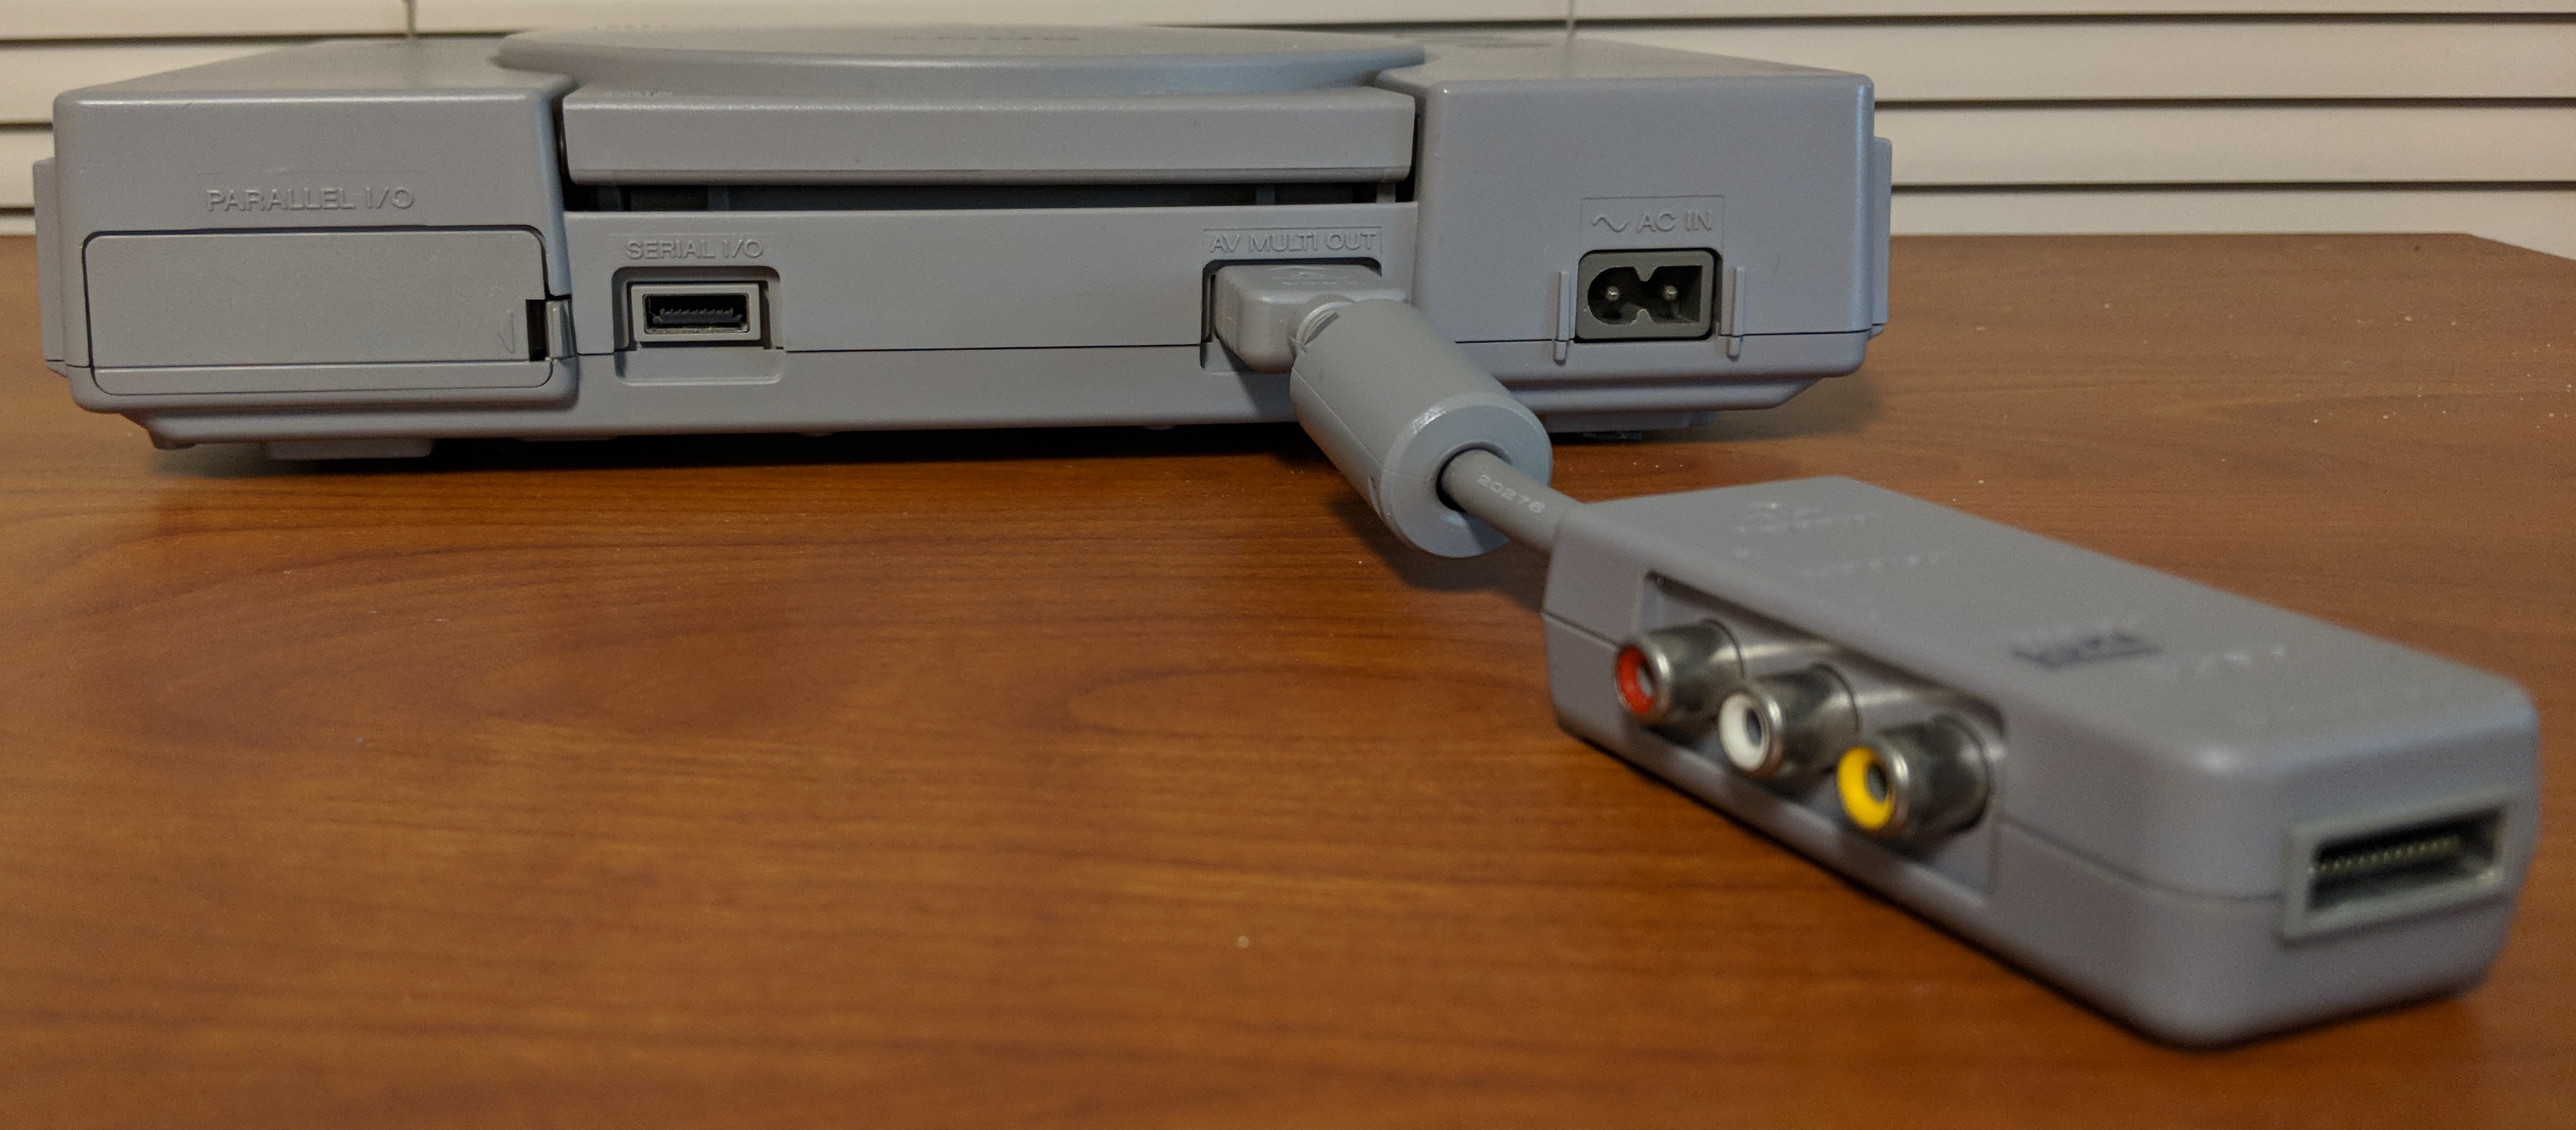
- 1x TV-Out connector (7-pin Mini-DIN or variant, also found on other computers of the period)
- 2x IEEE 1394 "firewire" ports (FW400 and FW800)
- 1x modem connector
- 2x 3.5mm TRS jacks, for audio output and a microphone
- 1x dual-link DVI-I connector
- 1x cardbus expansion slot(!)
- A fantastic feeling keyboard (though there are still some issues):
- Missing navigational keys, insert key, print screen key (not a huge issue in OS X, but convenient in other OSes)
- the F* keys are not spaced out into quads, so blindly reaching for them isn't as easy as it is on a classic Thinkpad
- No way to distinguish between left and right 'command' keys. They both send the same keycode. I think this might be a legacy of the Apple Desktop Bus (ADB) which they use internally, since my Apple Extended Keyboard (1987) also does this.
- Buggy controller(?) means that swapping caps lock and control cannot be done reliably (the caps lock key will miss some key release events when used as control). The JIS (Japanese) layout would have the control key in the correct spot, but would mess other things up for me. This happens in OS X as well as in Linux.
- Under a Linux kernel, you need to add the parameter
adbhid.restore_capslock_events=1to get caps lock releases to ever be detected. - You can't stop the caps lock LED coming on and off, either; I had to pop the key cap off and slide electrical tape over the LED. A harrowing prospect to mess up and end up needing a new board.
Note that the dual-link DVI connector is superior to Apple's later proprietary Mini-DVI in that it supplies far higher video resolutions. Apple took a step back and downgraded to 1920x1200 @ 60hz maximum when they moved to mini-DVI. The only dongle I can imagine needing on this machine would be a passive DVI-I to VGA adapter, if connecting the laptop to a CRT or similar. These are widely available and not Apple-exclusive; I have at least three. Apple sure doesn't build them like they used to.
Some other specs of this machine include a 1280x854 TFT LCD (of pretty good quality and a nice aspect ratio), a Motorola/Freescale PowerPC 7447a CPU (7450 derivative) with the Altivec SIMD instruction set, an ATI Mobility Radeon 9700 GPU (connected via AGP; there's a hardware bug with this that I'll try to get to later in the post), and initially (I believe) 512MB of DDR SDRAM. One of the first things I did was upgrading it to 2GB of RAM (its maximum amount).
I also replaced the battery pack with an aftermarket one almost immediately, since the original Apple one was toast and my charger plug is slightly bent/messed up. If the plug comes out or twists too much, the machine will lose power, and since the battery was totally ineffective that meant instantly and abruptly turning off. My particular aftermarket battery didn't quite sit flush with the bottom of the laptop's chassis, so I put a strip of silver duct tape around the edge of it to stop the thin aluminum plate on the bottom from scraping against surfaces.
Probably the single most major issue with the Powerbook (especially if not running OS X on it) is its single-button touchpad. This can be worked around; I'll try to remember to mention it when I get to writing about running Debian Linux on it.
There's also an intermittent problem I've had with the real-time clock (and PRAM) battery, which makes me think it probably needs replacing; I'll get to that eventually, but it's not a very big deal since I can synchronize its clock with my other machines pretty easily. It uses a rechargeable Panasonic CGL3032 Li-ion coin cell soldered to a small daughterboard with tabs.
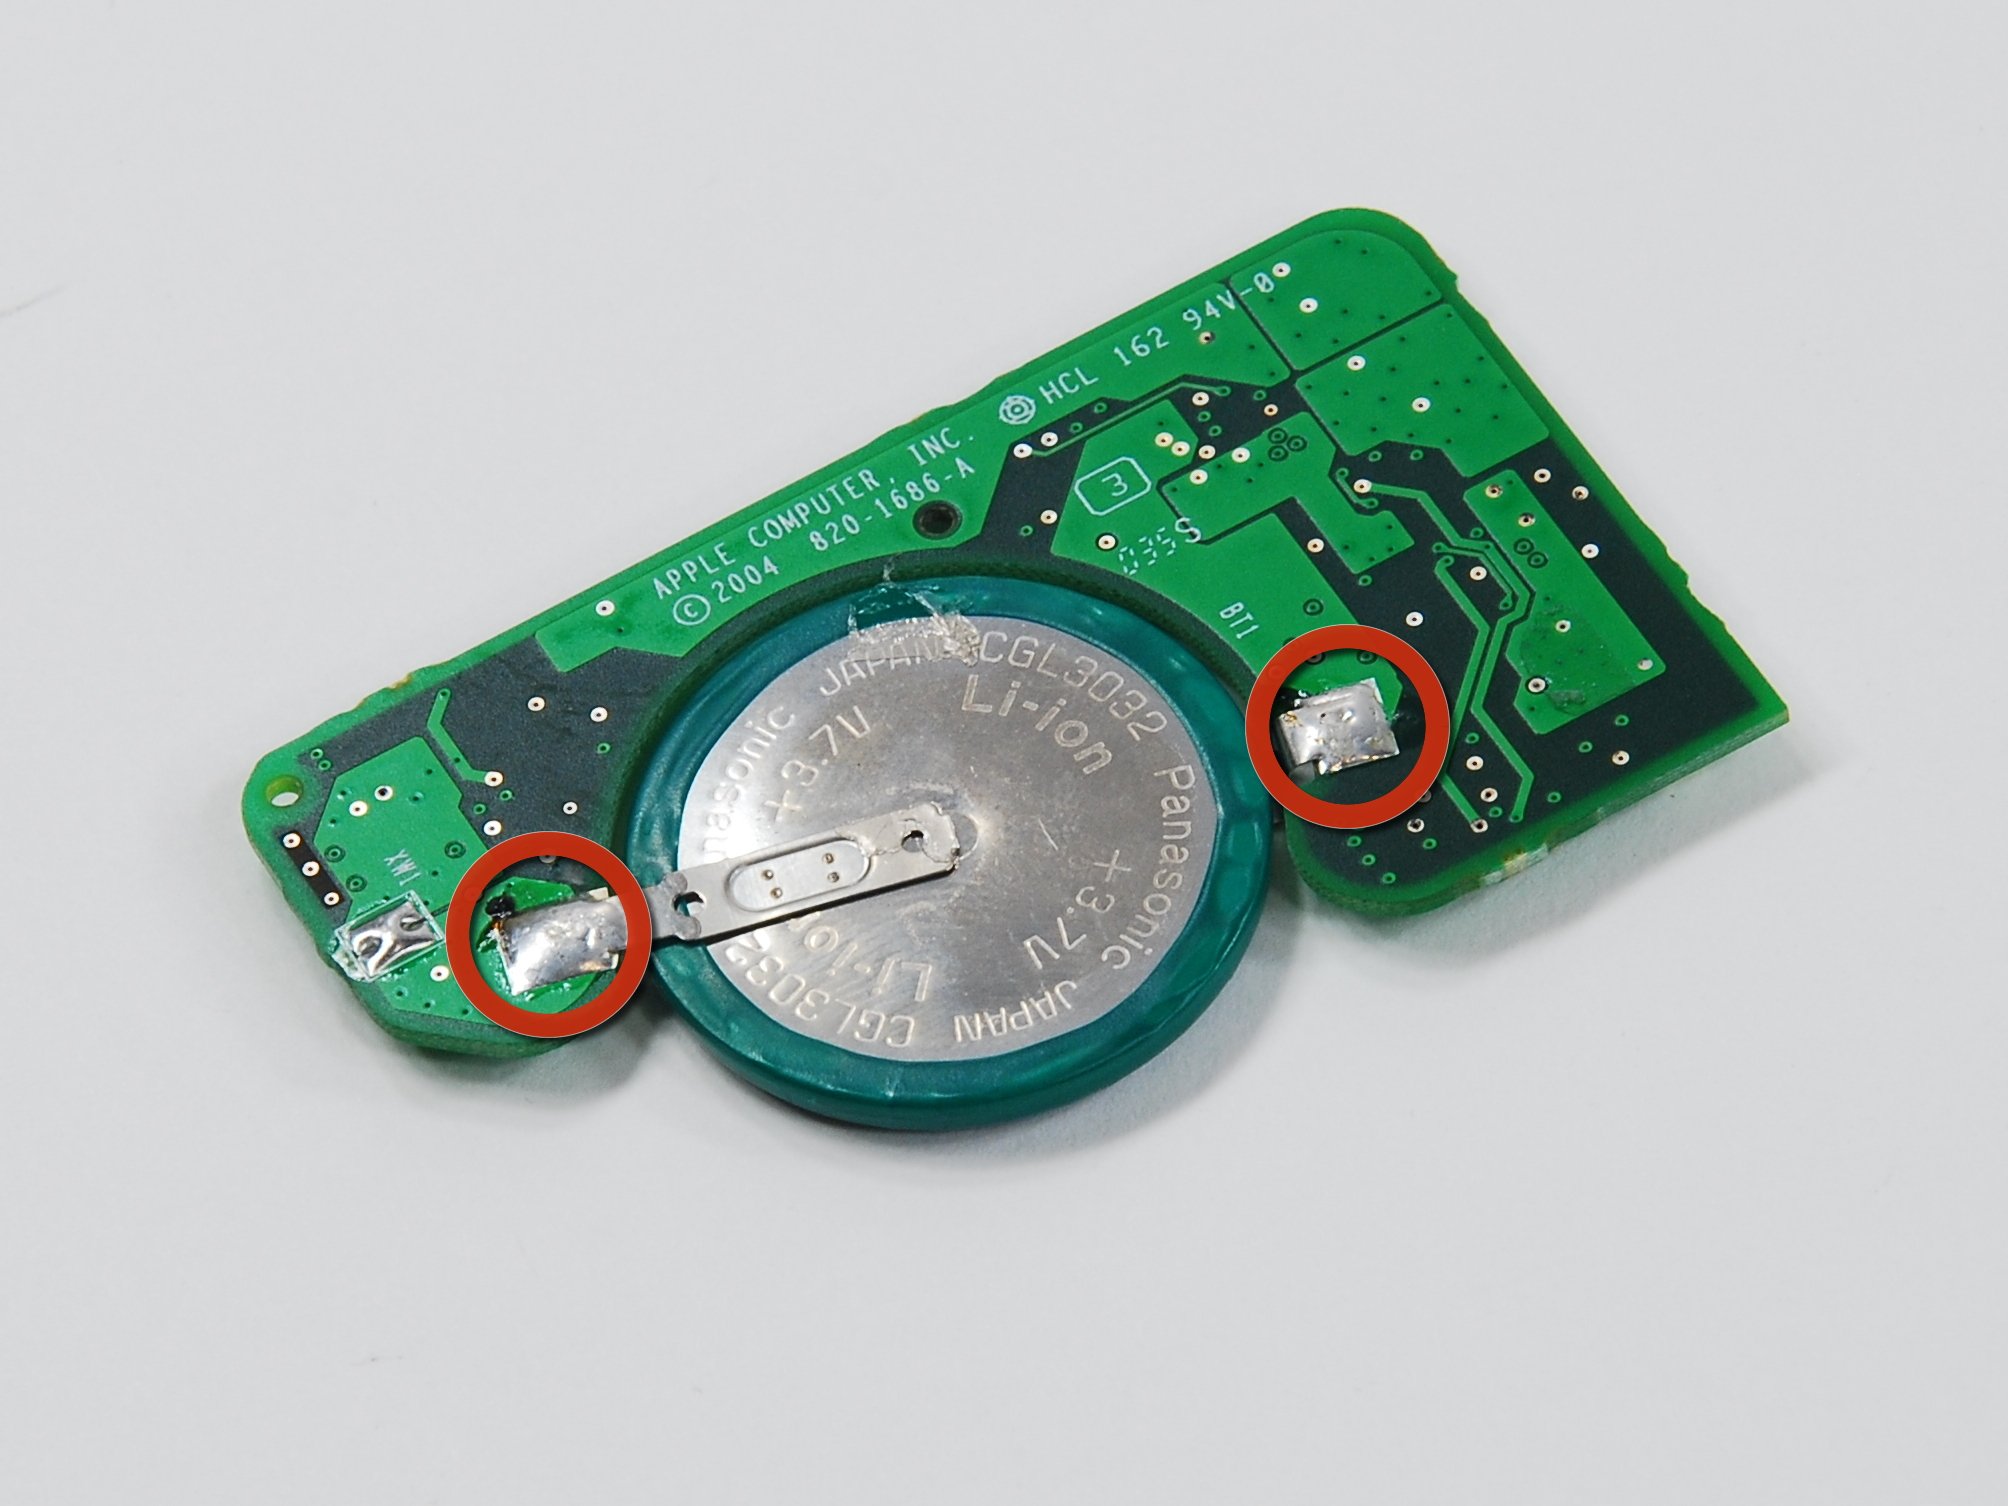
Since the original board assembly (part # 820-1686 or 820-1686-A) is apparently hard to find and often unavailable on ebay, etc., and the Panasonic coin cell in question is no longer in production, I'll probably end up ordering a similar cell I found on Digikey. Since that battery doesn't have solder tabs and I don't have equipment to weld them (risky), I'll either have to try taping it down, finding a battery clip that fits in the gap in the board, or throwing caution to the wind, sanding down the coin cell's sides (to create a rough texture), and soldering the tabs from the old battery onto it.
I've done that before with alkaline cells, although I don't like doing it at all, and I'm always afraid I'll injure myself some day doing it. I'm not sure I want to risk it with an Li-ion cell, so for now I've just resigned myself to keeping the existing battery in here until I stop being able to ignore it.
On that note, it should be stated that the system clock adjustment
doesn't work quite the same here as on an x86 PC compatible. On an
x86 computer, you'd use hwclock --systohc to write the
current time into the system's real-time clock (so that it survives
a reboot). This command does not exist on my Powerbook, though;
instead, it uses clock, version 1.4 I think.
To set the time on a Powerbook with this command, you'd first set the
system date using the date command like on other Linux
machines; specifically, date -s [timestamp], where
timestamp is a pretty flexibly formatted string that describes the
time - such as 'Wed 29 Jul 2020 08:03:25 PM EDT'.
Then, you need to update the hardware clock so that it matches (more
or less) what the system clock says. To do that on a Power mac, it'd
be /sbin/clock -w (as root) on my Debian system to write
to the register in the RTC.
This can and will survive reboots or power offs, seemingly so long as the main system battery is not fully depleted. The problem is only if you let it sit for long periods powered off and unused, or otherwise let the battery totally die in one way or another.
Software: Getting Rolling
At the time I bought the machine, I think it was running OS X 10.4 (Tiger) or 10.5 (Leopard), but I only booted it into OS X once or twice on it before diving deeper. To me, at least, there's almost zero reason to run such an outdated OS X version on these macs, since the Apple ecosystem makes finding software that is still compatible with it difficult at best, and even building source code for it sounds painful due to the age of the official Apple toolchain.
Thus, I quickly decided to put Debian on it. I chose Debian primarily because it's my distro of choice on my x86 desktop and laptop, but also because it actually had an official, current 32-bit PowerPC release (Jessie) at the time that I installed it. This is no longer the case (it's not what they dub a "release architecture" due to some problems), but it's still a part of the Debian "Ports" project, so a Sid-equivalent distro installer can be found here, along with several other less-popular architectures, and a Debian 10 CD image was also apparently created for PowerPC (in an unofficial capacity) here.
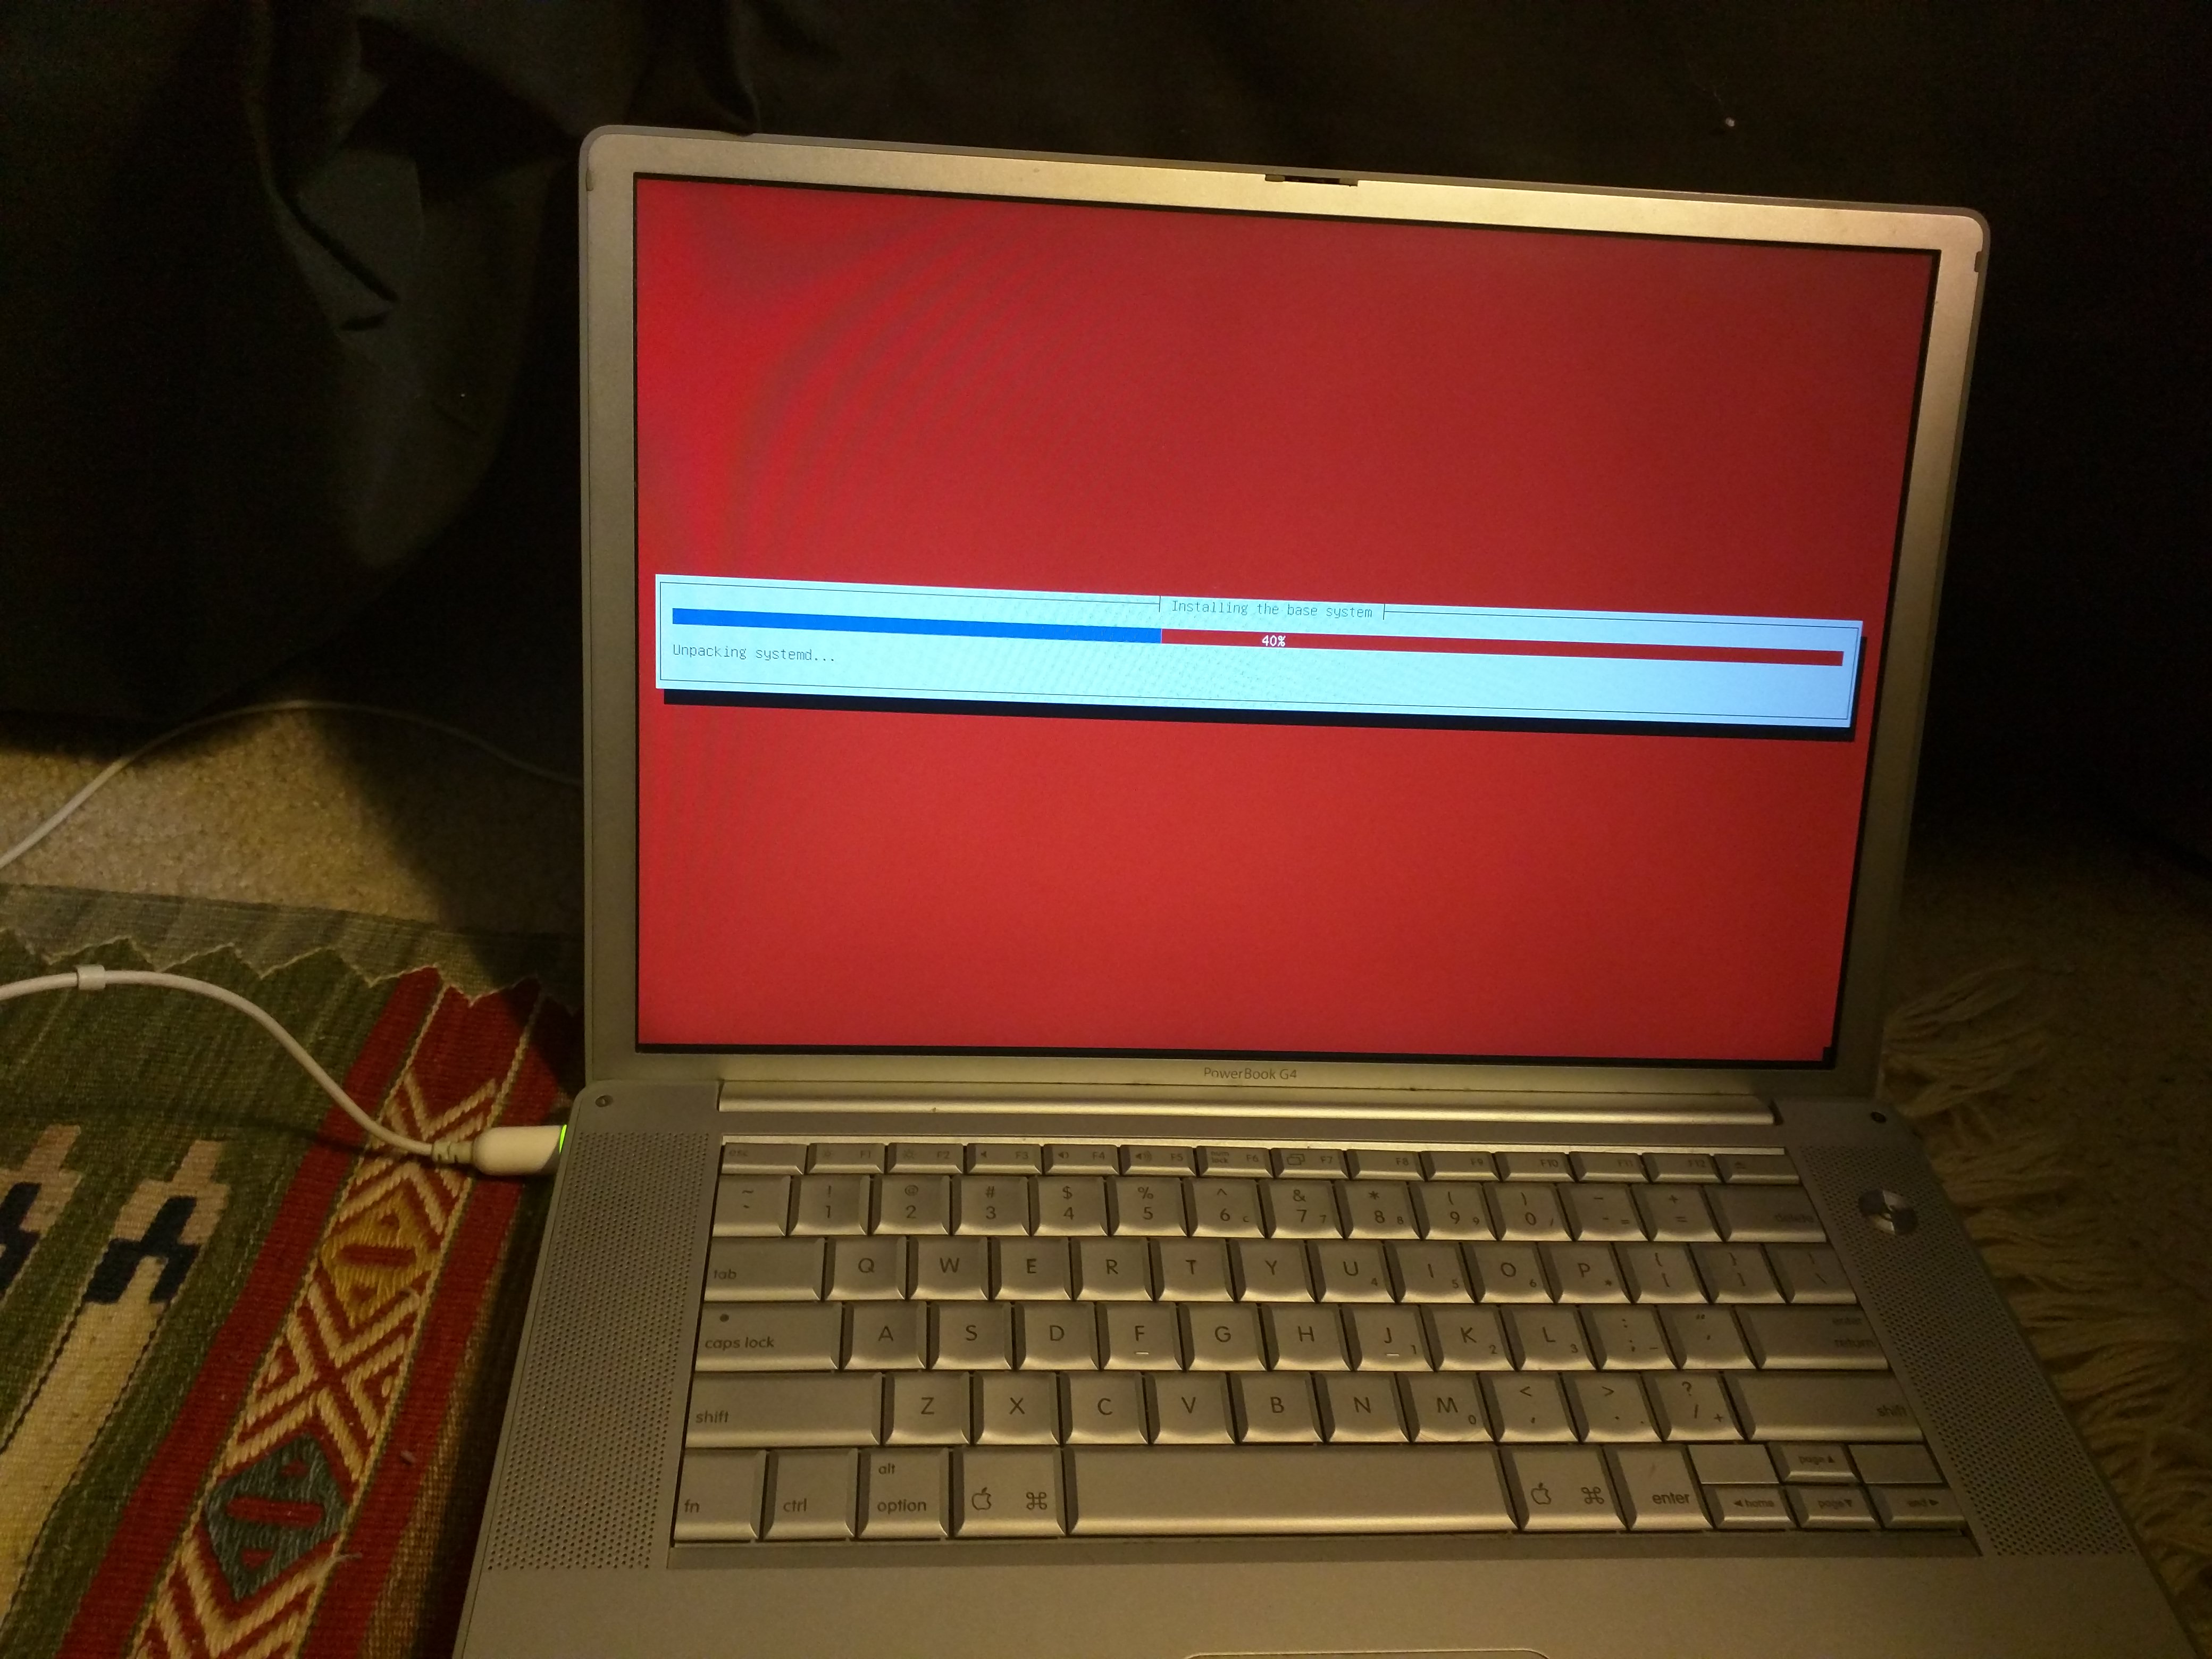
Anyway, I burned a Debian installer CD-R, after unsuccessfully attempting to get it to boot off a USB. Apparently, it can be done, but I was quick to lose patience with Open Firmware and went for the install medium which I was more certain could actually work.
Note: As of May 2024, I have tried a more recent installer and
it has failed to install the GRUB bootloader (which it appears to try
to use instead of "Yaboot" these days). For that reason, I suggest
using the Debian Jessie installer and then changing your sources.list
to that of "stretch," doing
apt-get update; apt-get dist-upgrade, then doing the same
to move to "buster," "bullseye," "bookworm," and then finally "sid"
(unstable). Yes, this is horrible, and I am sorry about that. :p
And maybe make a backup disk image when that's all done, or between stages.
This is of course going to require you to undergo
the /usr merge, so yeah,
that's fun. But newer debian does not appear to package Yaboot anymore,
so either you should manually obtain and install yaboot somehow, or do
this. Or figure out why GRUB isn't working! - For me, the error seemed
to be "not a PReP partition," which sort of makes sense given that
PReP is something some Debian PowerPC systems use to boot, but I don't
know how to tell grub-install that I'm actually on
something newer than that - or maybe how to tell it to not care about
that and keep going. I don't know how backward compatible "new world"
bootrom power macs are with PReP.
Wireless
After the installation (successful, btw), I copied over the firmware files for the Broadcom wireless chipset (for the Linux b43 driver). The chip in my machine is a BCM4306, and the airport card is a non-standard pinout so I can't just put a better card (such as one with an atheros chip that uses the ath9k driver) in, unfortunately. This is something I could use the Cardbus slot for in the future, though.
I've done this what feels like a dozen times or more on Intel machines, and it worked exactly the same here, so if you try this and have difficulties please note that you can just look at instructions from x86 users with older wireless chipsets. I happen to know that the process is quite similar on Dell Latitude D610 laptops, for instance, and I think the D630's as well. Many, many devices used Broadcom's BCM43xx chips for wireless LAN in the mid-to-late 2000's, so there's plenty of information out there.
Wireless: upgrade to 802.11n via the CardBus slot
Update:Well, it's been about a month since I wrote the above, and I got a suitable card for 802.11n (draft) on the powerbook at a good price new old stock on eBay. Not dual-band, unfortunately; those seem nearly impossible to locate. But still a huge improvement.
Do note that I don't believe this card has any drivers for PPC OS X, so don't get one of these if that matters to you. I think one or two manufacturers did make CardBus cards for 802.11n on Powerbooks, but I don't think those used Atheros chipsets so I didn't bother investigating further.
I specifically searched online for cards with Atheros chipsets because the "ath9k" Linux kernel driver can work with many of these chips without requiring a single binary firmware blob (so they are completely plug-n'-play under Linux, and I believe this is true under the BSD's as well). It had to not only be an Atheros card, it also had to be a CardBus card. I tried to find one with the right chips for dual-band, but they were all way too expensive for my blood. I eventually settled on a card that reportedly contained an AR5416 chip – a D-Link DWA-645 rev. A2. I spent around $12 on it. The 5416 can support dual-band, but only when paired with the correct radio chip (an AR5133 or AR5122; almost all cards seem to use the 2GHz-only AR2122 and AR2133 instead).
To choose your own card, if you go the Atheros route (recommended, unless you also want to use it for OS X), look at this table in the OpenBSD athn(4) manual page.
I linked to the page from OpenBSD 7.5 so that I could be sure the page would not change, but "current" OpenBSD's manual page (link) might have even more information available.
In order of suitability, with number one being the best, here's what I'd prefer for an 802.11N card:
- AR5008-3NX (AR5416+AR5133; 2.4 and 5GHz; 3 transmitter and 3 receiver paths)
-
Atheros reference cardbus design: AR5BCB-00072
- I have one of these; it's an Atheros-branded "engineering sample" reference card.
- More adapters using this chipset
-
Atheros reference cardbus design: AR5BCB-00072
- AR5008-2NX (AR5416+AR5122; 2.4 and 5GHz; 2 transmitter and 2 receiver paths)
- AR5008-3NG (AR5416+AR2133; 2.4 GHz only; 3 transmitter and 3 receiver paths)
- Atheros reference cardbus design: AR5BCB-00071
- More adapters using this chipset
- AR5008-2NG (AR5416+AR2122; 2.4 GHz only; 2 transmitter and 2 receiver paths)
- My D-Link DWA-645, revision A2
- Very common and cheap, still a huge improvement over Apple's internal card
- More adapters using this chipset
All of these are good upgrades from what's built-in, so if you can't find one of the 5GHz capable cards, just get a 2.4GHz one and it's still going to make an observable improvement. Most that I have found (like the D-Link card I talk about below) are 2.4GHz only.
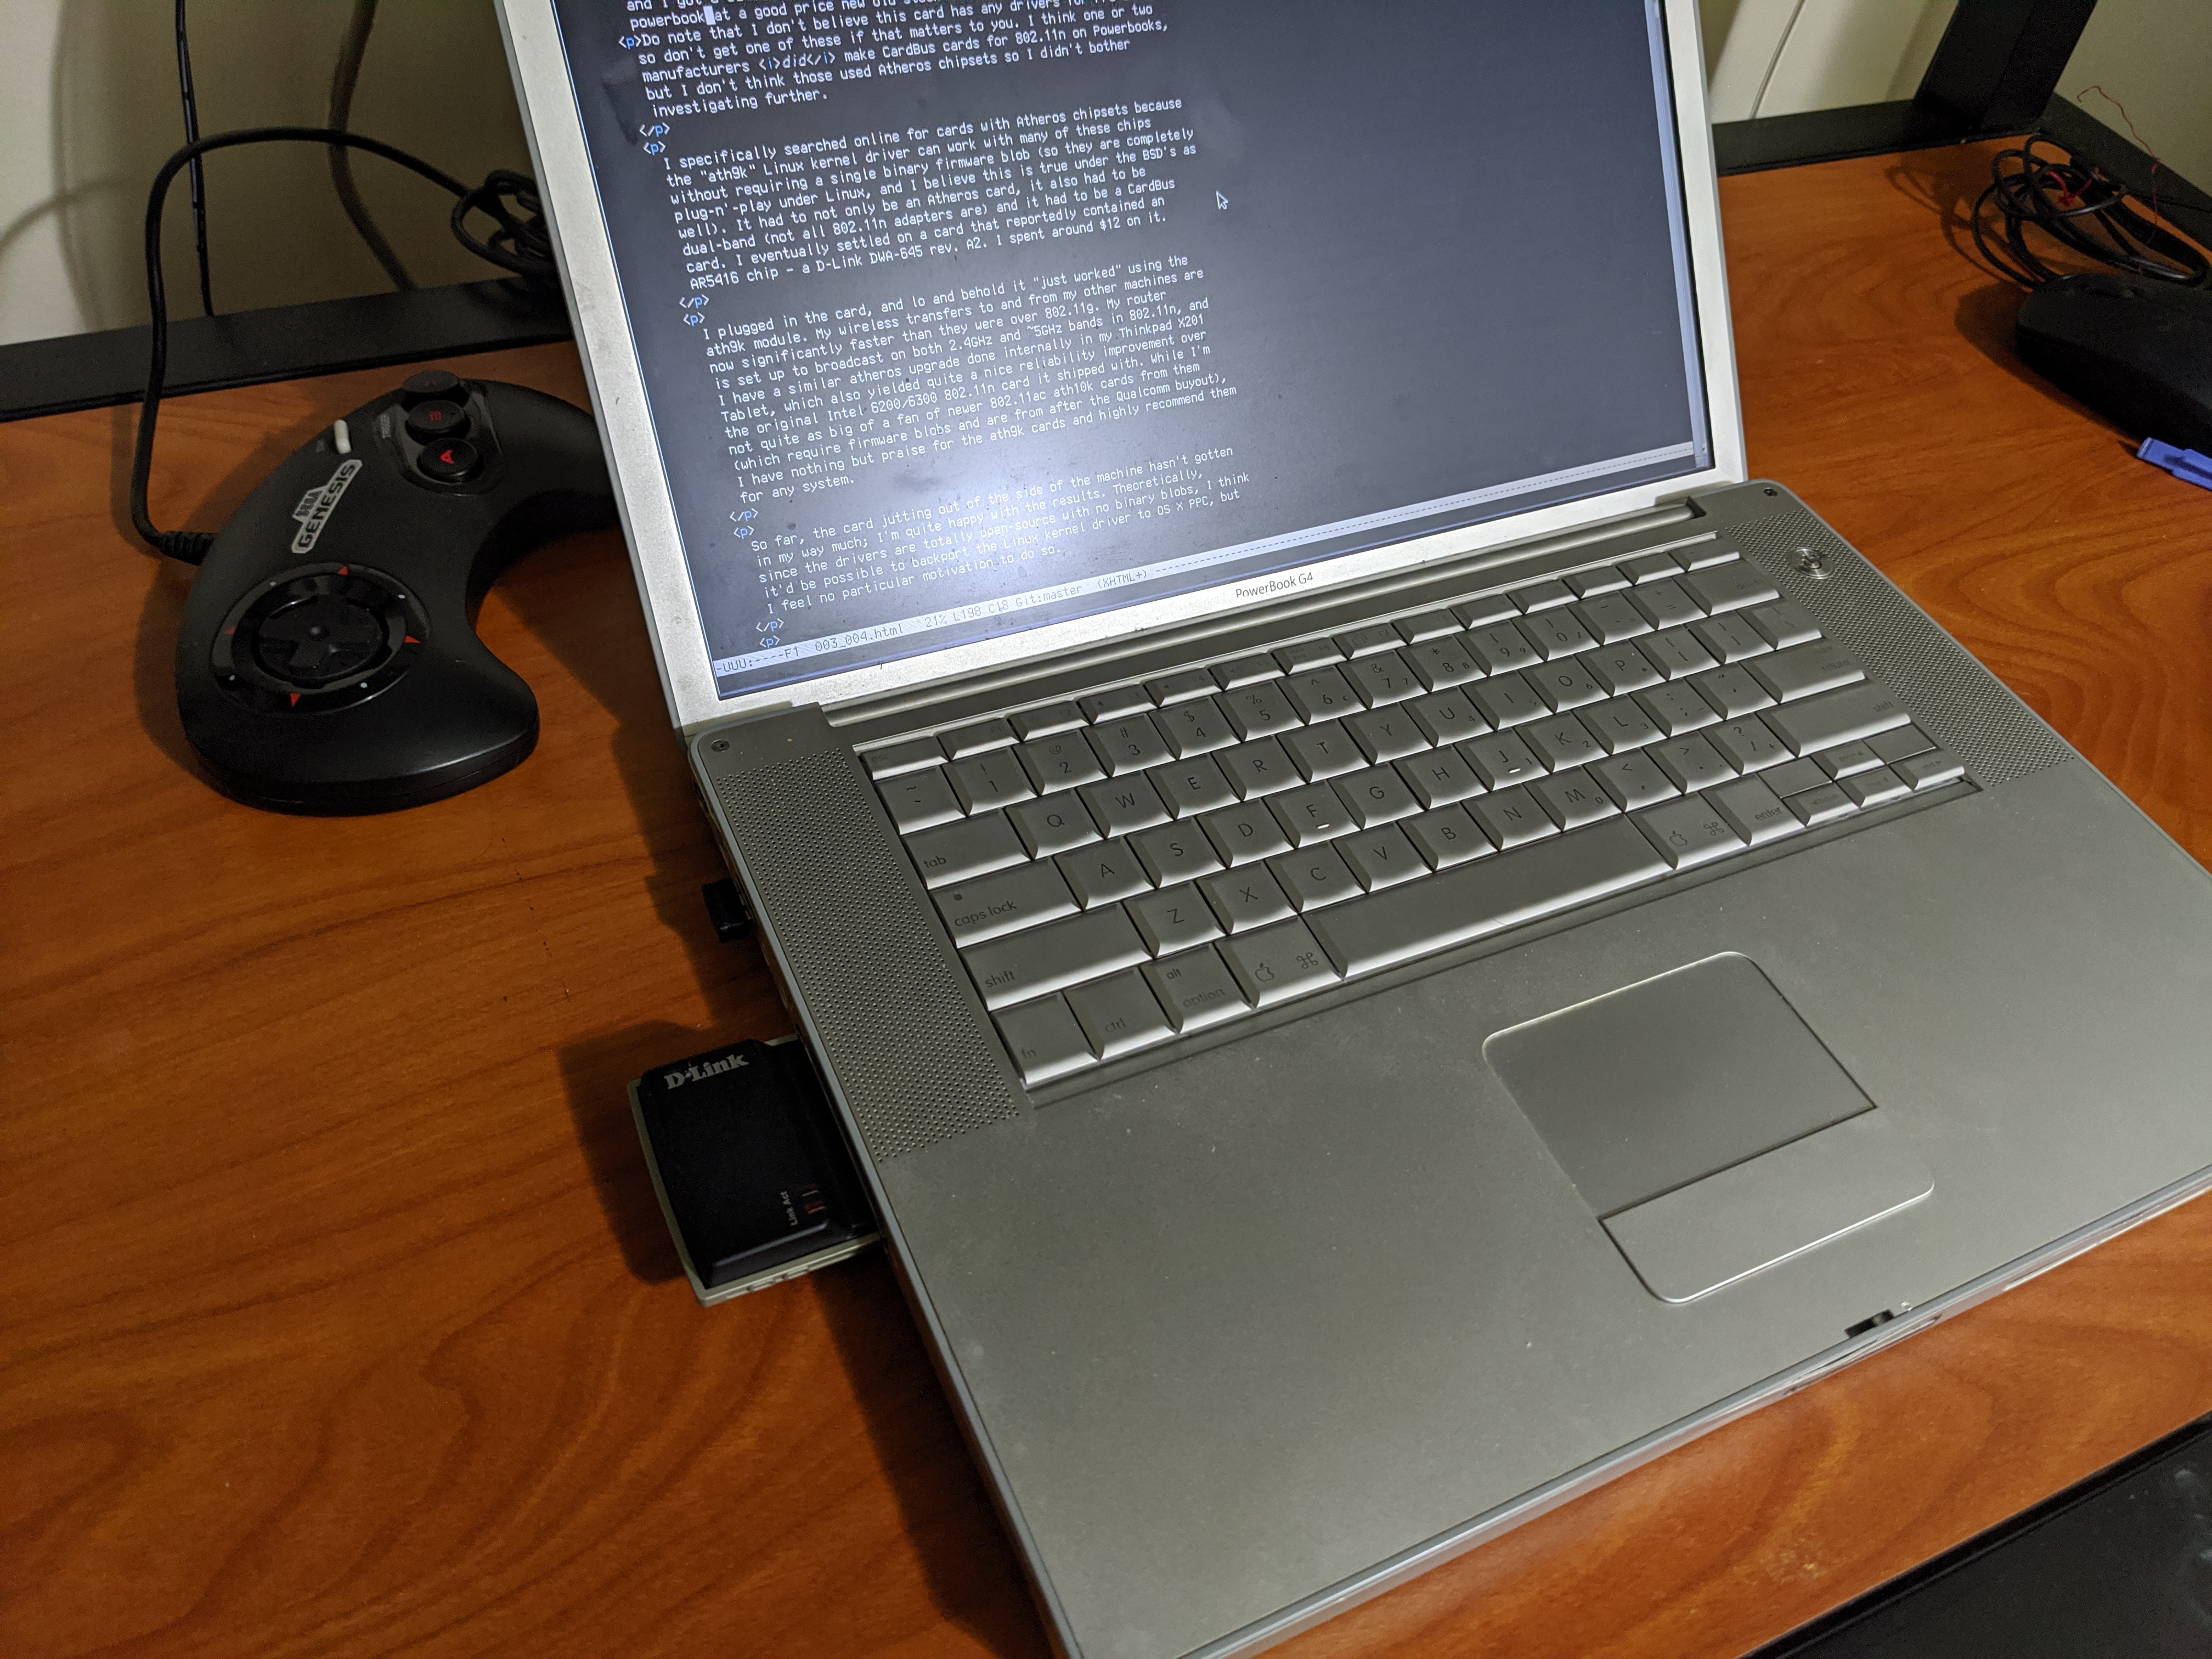
Also visible: this page, being edited in emacs.
I plugged in the card, and lo and behold it "just worked" using the ath9k module. My wireless transfers to and from my other machines are now significantly faster than they were over 802.11g. My router is set up to broadcast on both 2.4GHz and ~5GHz bands in 802.11n, and I have a similar atheros upgrade done internally in my Thinkpad X201 Tablet, which also yielded quite a nice reliability improvement over the original Intel 6200/6300 802.11n card it shipped with. While I'm not quite as big of a fan of newer 802.11ac ath10k cards from them (which require firmware blobs and are from after the Qualcomm buyout), I have nothing but praise for the ath9k cards and highly recommend them for any system.
So far, the card jutting out of the side of the machine hasn't gotten in my way much; I'm quite happy with the results. Theoretically, since the drivers are totally open-source with no binary blobs, I think it'd be possible to backport the Linux kernel driver to OS X PPC, but I feel no particular motivation to do so.
Fixing X.org (X server hang at startup; Radeon bug)
Since I used a 'netinstall' cd without a network connection, my Debian install was extremely compact. It didn't even have an X server, so I installed one from a shell after getting a network connection. Unfortunately, I hit a problem when attempting to use it: it'd hang pretty quickly after starting up.
It appears that Powerbooks with ATI GPU's have had issues ever since Kernel Mode-Setting (KMS) was introduced; additionally, recent kernels no longer contained the old User Mode-Setting (UMS) code. The issue stems from a bug with the AGP implementation on the Powerbook (I think maybe it was from a bridge chip, or something). Basically, a DMA controller (Direct Memory Access controller) would misbehave and corrupt something, if I remember correctly.
There are three solutions for this problem:
- Downgrade my kernel and Mesa versions to ones that use UMS
- Force the GPU to run in "PCI Mode," basically foregoing the AGP expansions. AGP is based on the PCI bus, but from what I can tell can have additional bandwidth by more use of DMA. Running in PCI mode side-steps the issue.
- Fix the terrible AGP code in the kernel which no one uses or wants to touch (even x86 systems apparently have problems).
Since I'm not a fan of running ancient kernels (I'd just use OS X 10.4 if I were), and I don't think I'm that much of a wizard, I opted to force the GPU to run in PCI mode.
This has to be done at boot-time. When the machine starts, there will be a Yaboot prompt, where it waits for a few seconds for you to type something and then boots up. Yaboot is basically the Open Firmware-based bootloader that Debian uses instead of GRUB by default on PowerPC. If you don't type anything (or just hit "return"), you'll see the word 'Linux' appear on the screen, followed by a couple more lines before the kernel starts showing its information.
This prompt is a place that we can add new temporary parameters, though! When prompted, type (case-sensitive, I think):
Linux radeon.agpmode=-1
…and press "return."
X should now work mostly fine, but if I remember correctly, I still
suffered from occasional hanging. I was able to fix this with some
more options stuffed into /etc/xorg.conf:
Section "Device"
    Identifier "Radeon"
    Driver "radeon"
    Option "AccelMethod" "EXA"
    # DRI3 tends to be unstable on everything I try it on, even modern-ish Intel machines:
    Option "DRI" "2"
    # actually boosts performance when on; might cause instability on some machines but not mine:
    Option "EXAPixmaps" "on"
    # I just hate tearing, so I threw this in there:
    Option "TearFree" "on"
    # known to cause instability on some machines, see radeon man page. Mine seems fine:
    Option "EXAVsync" "on"
EndSection
I am not sure if you can ever reach the same speeds as you would if AGP actually worked, but honestly it runs well enough for me to use a composited window manager (compton) and to emulate a Sega Mega Drive/Genesis (using Genesis Plus GX), so that's all I really need.
To make the change more permanent, there are multiple ways to proceed.
One way that I see recommended is to add the argument to
/etc/yaboot.conf (as an append= line).
This works, but if you start throwing a bunch of arguments onto the kernel, or if you have more than one kernel you want to choose between, this becomes a bit of a hassle. So I chose a different approach:
I created a file called /etc/modprobe.d/radeon.conf,
containing these lines:
options radeon agpmode=-1
options radeonfb agpmode=-1
I think the 'radeonfb' thing is a non-sequitur (frame-buffer with AGP DMA?) but better safe than sorry, since radeonfb is basically supposed to be a failsafe mode.
I then ran these commands to make sure the changes stuck for my next
boot (note that I think the ybin -v was unnecessary, but
it updates the yaboot configuration):
$ sudo update-initramfs -u
$ sudo ybin -v
After doing that, my system has never hung in X.
Fixing DVI Output
As an aside, it's worth noting that to get the DVI output to work
properly (outputting a digital signal), you need to pass another
parameter to the radeon kernel module in Linux. Powermacs
apparently don't actually contain a "connector table" telling the
system where the video connections are physically mapped to. So you
have to manually tell the driver where it should look for things. So
without further ado, here's a couple more lines I added to my
/etc/modprobe.d/radeon.conf file:
options radeon connector_table=4
options radeonfb connector_table=4
You may have to play with other values to find one that works for you... and pass in the arguments on the yaboot prompt in case you misconfigure it so it doesn't drive your internal LCD correctly anymore.
I had to dig through the driver's source code to figure that one out. No one else seems to really talk about it anywhere. The closest I got was a discussion from back when the option was set in user-space (from Xorg.conf, for instance).
To figure out what setting you need, you may want to look in that
source file at the radeon_connector_table definition. For
my laptop, I needed CT_POWERBOOK_INTERNAL, which has the
index 4 based on its position in the list. Without this,
the DVI port would only output analogue video.
The
documentation for the X.org radeon driver
might also be useful for determining what you need, although in my
experience the MacModel option no longer works there. Do
also note that the version of this man page installed on my Debian
system does not include the bit about MacModel at all,
since it hasn't worked since the move away from User Mode Setting
(UMS). But it gives better descriptions of what the different types
mean than the kernel sources do for KMS (Kernel Mode Setting):
Option "MacModel" "string"
    Used to specify Mac models for connector tables and quirks. If you have a
    PowerBook or Mini with DVI that does not work properly, try the alternate
    options as Apple does not seem to provide a good way of knowing whether they
    use internal or external TMDS for DVI. Only valid on PowerPC. On Linux, the
    driver will attempt to detect the MacModel automatically.
        ibook −− ibooks
        powerbook-external −− Powerbooks with external DVI
        powerbook-internal −− Powerboo with integrated DVI
        powerbook-vga −− Powerbooks with VGA rather than DVI
        mini-external −− Mac Mini with external DVI
        mini-internal −− Mac Mini with integrated DVI
        imac-g5-isight −− iMac G5 iSight
        emac −− eMac G4
    The default value is undefined.
I happen to know my powerbook uses internal TMDS because I have seen the schematics for it, but I don't know how users are expected to find that information, since Apple didn't exactly intend to share the schematics with anyone or make it obvious to the layperson that it was showing internal TMDS. Almost twenty years later, I doubt they care as much, but the schematic copies I saw were under an NDA forbidding me from redistributing it. So I'm not going to. Sorry. I wish I could.
But, if you want to hunt for it, you want drawing number 051-6809, titled "SCHEM,MLB,PB15," revision B... if you have my model, at least.
Changing keyboard/mouse behaviors
I think the next thing I did (after installing an X server, since I
had done a minimal offline install initially) was to make the touchpad
less annoying (disable 'tap-to-click') and to make the "F*" keys send
the "F*" keycodes instead of their "brightness/volume adjustment/etc."
ones when pressed without holding the 'Fn' key. I found a package called
'pmac-utils'
which contained the tools I was looking for. After it was installed, I
added the following to the end of my /etc/rc.local file:
if [ -e /sbin/trackpad ]; then
  /sbin/trackpad notap || /bin/true
fi
if [ -e /sbin/fnset ]; then
  /sbin/fnset -u || /bin/true
fi
Note that if you are using systemd as your init system, you can't run
stuff at boot from rc.local like I did. I'm using
'sysvinit' (System V Init) for my init system. You'll have to find
your own way to run stuff at boot. A quick search suggests that
this might not be too hard to do, but I have not tried it myself.
Right-click with touchpad using Mouseemu
I also installed a program called 'mouseemu,' which basically can intercept keystrokes and mouse/touchpad inputs, listening for keyboard modifiers when clicking to simulate pressing other mouse buttons. I decided to configure it so that holding a 'command' key while clicking would send a right click keystroke.
This program has a side-effect of preventing buttons beyond the standard left click, right click, and middle click/scroll from working when using an external USB mouse (since it intercepts and translates input from all devices), so I also made a modified version of it that can pass through two additional mouse buttons (BTN_SIDE and BTN_EXTRA). These are the other buttons on a Microsoft Trackball Optical and are used in many mouses for navigating forward and backward in a web browser (they are mouse button ID's 8 and 9 in X). My patch is here, by the way, in case you want to add even more buttons yourself.
Mouseemu is configured on my system via
/etc/default/mouseemu, which is sourced by init scripts
in /etc/init.d/. I am pretty sure that the configuration
is sourced the same way on a Systemd-as-init machine. To find the
keycodes you need to pass to it, either find the key ID's in
include/linux/input.h or run showkey outside
of X (in a TTY; ctrl-alt-f1 for instance). Here's my personal
configuration (note: I am pretty sure 272 is the mouse
button event, going from memory):
RIGHT_CLICK="-right 125 272"   # command + click
MID_CLICK="-middle 100 272"    # fn+alt+click
SCROLL="-scroll 0"             # disable scroll key for now pending investigation (no idea how it works...)
TYPING_BLOCK="-typing-block 0" # block mouse for 0ms after a keypress, or it interferes with playing Quake!
If you don't like the sensitivity or other things with the touchpad, and you are using mouseemu, note that any configuration changes need to target the "Mouseemu virtual mouse" device, rather than the "ADB mouse," for instance. This is because Mouseemu basically acts as a middle-man between your keyboard/mouse and X.
Video Playback: MPlayer
The PowerBook G4 seems to be pretty underpowered by today's standards in many ways; one of the most immediately recognizeable is how much it struggles to decode h.264 and render videos. It can handle 480p well enough, but chokes if you try 720p (for the screen's native resolution). At first, I thought this was the GPU's fault (on account of having to disable the DMA functionality/AGP features), but later I remembered "oh, yeah. back in the day h.264 required good hardware to decode." I'd compare it to trying to decode HEVC on my circa 2010 laptop hardware.
Additionally, mpv's codebase is regularly purged of anything "legacy," and the performance of the supported video output drivers is not great. I've always been partial to MPlayer, anyway, so I grabbed and compiled it. I discovered the best video output driver for performance to be 'Vidix.' Documentation on Vidix is quite lacking, and the code for it appears to be about twenty years old, so it was a little confusing to figure out. Basically, though, it requires direct hardware access, so mplayer needs to be run as root (either with sudo or a setuid bit). Additionally, to tell it I am using a radeon card, I put this in my ~/.mplayer/config file:
vo=xvidix:radeon
I think I had to put that under /root/.mplayer/config, actually, on
account of having to run as root.
Anyway, after doing that, I still had the h.264 problem. So with my sample video ( Bubblegum Crisis, episode 5: "Moonlight Rambler"), I converted it to use almost-MPEG-4 video (xvid codec) via ffmpeg on my desktop and then moved the file over. The resulting video (using xvid for video and vorbis for audio) played back at full speed with no tearing at 720p in MPlayer!
It is possible baseline profile h.264 could have also worked, but I didn't test that. Xvid videos are so fast to encode; it's great. I hadn't used it in a long time. It's also possible that proper MPEG-4 (-vcodec mpeg4 in ffmpeg) might have worked. Xvid is technically a derivative of the draft MPEG-4 implementation as created by Microsoft in the late 90's or early 2000's, so it's approximately period correct as well.
FVWM (Window Manager)
FVWM is a very light-weight window manager that I like to use on my computers.
I discovered FVWM when I was trying to run Debian on an Android phone with an X server based on SDL. It worked when a lot of other WM's didn't want to, and I also managed to configure it to behave closer to what I expect of a "regular" window manager like Gnome/MATE or the MS Windows window manager. Reading the documentation, it quickly became clear to me that FVWM was ridiculously flexible.
Since I was able to make it do basically everything I wanted, I remembered it when I later decided to try CDE (Common Desktop Environment) on a whim over a weekend. It seemed kind of nice, but also pretty limiting. I decided that I could use FVWM to make it act like MWM (Motif Window Manager, the basis for CDE) with a few more features. And then I just sort of never looked back.
My FVWM config file is based on modifications to the FVWM 2.6 template file that shipped with Debian, but I now run FVWM 3.x (built from git). FVWM3 supports multiple monitors and rotation slightly better via RANDR - 2.6 only supports Xinerama, which is pretty much no longer in use. Other than that, up to this point, the configuration file has required only minimal alterations to work in FVWM 3.x.
One of the nicest things about FVWM is the console. You can
interactively configure things in FVWM by writing lines in a console
to test them without reloading your fvwmrc.
Anyway, not too much to say here, except that FVWM performs nicely,
and with a compositor (e.g., Compton, Picom), it also renders well.
If there's any behavior of it that you don't like, it is very likely
possible to change it (without having to recompile anything) via its
configuration file. To move to a new computer, it's as easy as copying
the ~/.fvwmrc file or ~/.fvwm directory.
To extoll more virtues of FVWM, it's easy to implement things like a "forced full-screen" mode by making a keyboard shortcut that hides the decorations and borders on the current window and then maximizes it. FVWM can also be used to make pretty much any other keyboard shortcuts one might want, whether they be for window manager actions or for launching external programs/scripts.
Anyway, I recommend FVWM not only for lightweight systems like this but for all Unix machines. It's really excellent. If you're an emacs user already, you will be quick to understand its appeal to me when you try it.
...What do you mean, you "don't use emacs?"
Anyway, if I had to identify a downside of FVWM, it would be that its sheer number of options and commands can become overwhelming when reading the man page. Still, the FVWM IRC channel is a great resource, and the primary maintainer/current developer (Thomas Adam) idles there. I have had good luck getting help on there (usually pointing me to some section of the man page I overlooked) in situations where I felt I needed it.
Another downside is that it ruined all other window managers for me (and MS Windows).
Fan Control/Tuning
The fans on the Powerbook G4 are quite loud when they kick in, even at their lowest speed; under Linux, by default they kick in if you do almost anything on the system– that is, when the CPU or GPU (probably CPU, I think) hits 50 degrees celsius. This is quite nice for lap use/comfort, since powerbooks (and all power-hungry apple metallic laptops, really) like to use the human's legs as a heat sink, but even after I changed the thermal paste and pads (not a fun job, I'll add), the temperatures barely improved, if at all! So I did some digging.
The fans on the powerbook are controlled by an ADT7460 chip (reference:
search for Apple "051-6809" "PB15"; you want to find a
PDF). The documentation in the linux kernel (for the
ad746x driver) states that by setting a field called
limit_adjust in sysfs, I can tweak the temperature the
fans come on at relative to the default threshold. So setting it to
-5 would make it come on at 45 degrees, and 5
would make it come on at 60 degrees, for instance.
If you can't seem to find this stuff in sysfs, then make sure you have
the therm_adt746x module loaded. I have it in my
/etc/modules file, but I think the recommended practice
now is to put things in files under /etc/modules-load.d/
instead.
So the next question becomes, "what's a safe temperature?" - and the
answer seems to be that non-military/industrial PowerPC 7447A chips
are rated for a die junction temperature of up to 105 degrees celsius.
And at least the 7447A chips, have a thermal sensor built into the chip
itself specifically to measure the die junction temperature. Not all
other "G4" CPU's do, though, so check what you have by reading
/proc/cpuinfo. If you can stand it I'd suggest just
leaving the setting alone, but even if we allow for a margin of error
of plus or minus 20 degrees celsius on heat measurements, that means we
could set limit_adjust to 20 safely and have
the fan come on at 70 degrees.
I decided I'd like to be able to control this easily without using sudo
all the time, so I decided to write a (very safe, I'm sure...) C
program with root as its owner that has the
setuid bit set. This means the program runs as root - so
you may want to try an alternative solution, like writing a udev rule.
I don't think the code is bad, but it's a risk it might be better not to take.
Regardless, you can find my C program under my
misc-c-tools
repository, in the powerbook directory. To make things
even more comfy for myself it can be coupled with this shell script.
Place your compiled setuid C program in ~/bin along with this script
and add "$HOME"'/bin' to your PATH
environment variable. I just call the script fan.
#! /usr/bin/env sh
# View or adjust powerbook fan temperature thresholds for activation.
# See the datasheet of your system's CPU to figure out a safe range.
# PowerPC 7447A: maximum temperature: 105 degrees celsius
# https://www.nxp.com/docs/en/data-sheet/MPC7447AEC.pdf

# NOTE: with some chips (like PowerPC 7447A), I seem to recall
# reading somewhere that they can have measurements off by a fair amount
# in either direction, but I think it's fair to assume that +-20 degrees
# is *plenty* of wiggle room. So that'd mean it'd be safe to set the limit to
# 20, probably (which would make the fan threshold 70 degrees). I usually stay
# under 10.

# fanlimit is a setuid binary that this script passes arguments to. Gee, that
# sure seems safe!
# It adjusts the threshold temperature relative to its "default" threshold.
# If the default threshold is 50 degrees Celsius, then running this script
# with the number '6' as an argument would make the fan threshold become
# 56 degrees Celsius. Likewise, '-6' would make it become 44 degrees Celsius.

details() {
  CTRL_PATH='/sys/devices/platform/temperatures'
  echo 'Limit adjust:     '"$(cat "$CTRL_PATH"'/limit_adjust')"
  echo "Pref'd Fan Speed: ""$(cat "$CTRL_PATH"'/specified_fan_speed')"
  echo '--'
  echo "Sensor 1:"
  echo "  Temperature:    ""$(cat "$CTRL_PATH"/sensor1_temperature)"
  echo "  Threshold:      ""$(cat "$CTRL_PATH"/sensor1_limit)"
  echo "  Fan speed:      ""$(cat "$CTRL_PATH"/sensor1_fan_speed)"
  echo "Sensor 2:"
  echo "  Temperature:    ""$(cat "$CTRL_PATH"/sensor2_temperature)"
  echo "  Threshold:      ""$(cat "$CTRL_PATH"/sensor2_limit)"
  echo "  Fan speed:      ""$(cat "$CTRL_PATH"/sensor2_fan_speed)"
}

if [ "$#" -eq 0 ]; then
  details
else
  "$HOME"'/bin/fanlimit' "$@"
  details
fi
Then, using it is as easy as running the command fan
in a terminal to view temperatures and settings, or
fan <number> to adjust the fan's activation
threshold to (baseline) plus (number). In other words,
fan 6 would make my fan come on at 56 degrees celsius.
I wouldn't go higher than 20, but there's nothing to stop you from doing that, if you want. I just really think the cooler the better for the laptop's longevity, so I'm okay with the fan coming on around 55-60 degrees celsius.
To-Do (Article Under Construction):
I'll try to come back to this and expand on it later. There's tons more stuff that I've also done. Here's an outline of topics that I think I can cover (consider it an informative teaser, of sorts):
- Fixing Firefox 52/Seamonkey 2.49 on PowerPC:
- Official Debian package was really buggy/crash-prone
- Performance went way up by comparison; crashes pretty much never
- Re-introduces ALSA support (no pulseaudio requirement for sound anymore)
- various post-installation tweaks to its configuration to improve compatibility with modern websites
- Newer versions of FF appear to be a showstopper, due to vast architectural changes and general apathy on Mozilla's part, but I will discuss possible solutions/workarounds.
- In the meantime, see the Reddit post that I already made for a decent write-up.
- NetSurf, for simpler websites (such as this one)
- High performance
- Low RAM usage
- Highly portable (written in C; has BeOS, RiscOS, and Amiga ports)
- pretty solid HTML 4 and CSS 1/2 implementation
- Displays my webpage fine, at least ;)
- Marginal HTML5/CSS3 support
- Nominally uses the Duktape Javascript engine (can be seen with pretty much only canvas elements)
- Almost no support for other dynamic web content as of now
- Porting miscellaneous programs, fixing big/little-endian mixups
- Music/audio programs (e.g., a playstation chiptune player)
- Various emulators
- Getting GIMP 2.10
- Basically, a library Gimp 2.10 uses (gegl, I think) builds fine, but one of the post-build tests times out due to poor performance on PowerPC (and MIPS).
- I blame Meson, because I generally find myself annoyed with it for other reasons, too, and it's a good scapegoat
- Due to this, Debian's build bots think the package failed to build
- Since it depends on this library, GIMP 2.10 doesn't exist in the Debian repositories for PowerPC
- However, you can tweak the build configuration, rebuild it yourself, and then (after a very slow/long build process) GIMP 2.10 actually works fine. I'll detail how to do this
- Porting software-rendered and GL Quake (Quake 1)
- I prefer software-rendered quake over any of the "modern" engines; after a lot of confusion I figured out how to get this version working on PowerPC (avoiding x86-specific assembly code)
- Java: What works and what doesn't
- OpenJDK is horribly slow
- IBM's J9 VM for Java version 6 can be made to work, performs great (set 'JITC_PROCESSOR_TYPE' environment variable to 6). Unfortunately it's hard to find a link to (though it IS semi-publicly available, still) and is rather out of date. J9 for Java 7+ does NOT work.
- Filename:
ibm-java-ppc-sdk-6.0-9.0.bin - crc32:
23b6675d - I think that this is the URL, but you'll need to register for an IBM account to access it. Also note that that link was valid at the time that I downloaded it, which was in June 2018. I just had it bookmarked on one of my machines. I forget my IBM ID, so I can't verify it now (in 2021) too easily.
- Since IBM recently released J9 as open-source, some efforts have been made to add 32-bit PowerPC support back (it got dropped at some point prior to the open-source release); it appears this can mostly work, but I have no idea how to cross-compile it, and am not sure I have the motivation, either.
- Go, Node.JS, .NET, and other "problem spot" languages/frameworks
- Prior to Microsoft contributing to Mono, it actually worked fine on PPC32. So MS ruins everything, as usual.
Stay tuned!